

A Study Case Based on MAAMD
Hypoxia, insufficient oxygen supply of tissues and cells, could be caused by inspiration of gas whose oxygen content is lower than 21% O2 at sea level or diseases such as obstructive pulmonary disease, myocardial infarction, stroke. The underlying conserved cellular responses to hypoxia are not fully understood. A study of orthologues responding to different hypoxic conditions or in different species could identify potential conserved genes and help further understand conserved cellular adaptations to hypoxia. Thus, we used MAAMD to identify transcriptional responses to hypoxia that are conserved in multiple hypoxia experiments and between mice and Drosophila. More details, please refer to the publication: MAAMD: A Workflow to Standardize Meta-Analyses and Comparison of Affymetrix Microarray Data, BMC Bioinformatics, 2014.
Here, we use this study case as an example of the utilization of MAAMD, and conduct the users how to use MAAMD step by step.
Here, we use this study case as an example of the utilization of MAAMD, and conduct the users how to use MAAMD step by step.

Step1. Tool installation
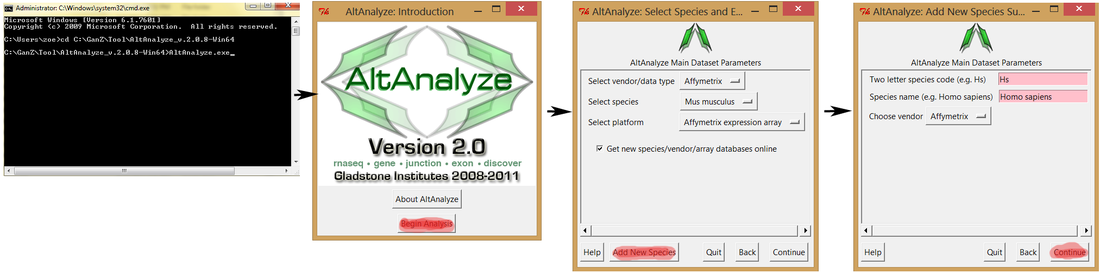
Download, install and configure tools following the instructions in introduction page.
You need install species libraries for AltAnalyze following the instruction, below are the screen shots
open AltAnalyze -> Begin Analysis -> Add New Species -> Input species and vendor -> Download libraries automatically.
You can check the list of species here.
Step 2. Download MAAMD
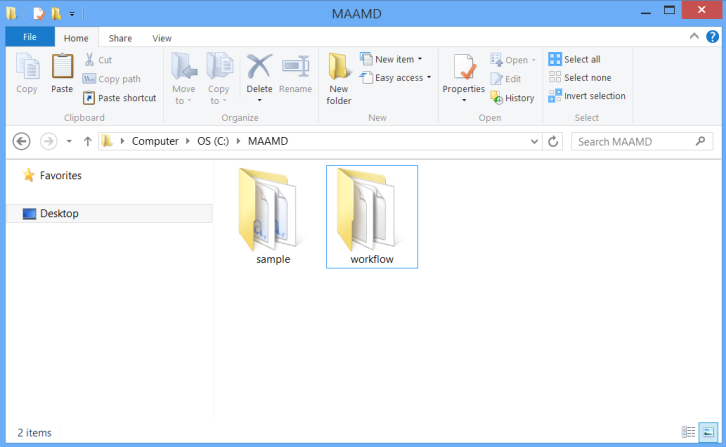
Download MAAMD.zip and uncompress it to C:\MAAMD as showed in figure below.
You would see two folders, 'sample' and 'workflow'. The 'sample' folder contains required input files. The 'workflow' folder contains the workflow files and required resource files such as 'homologene.txt'.
Download MAAMD.zip and uncompress it to C:\MAAMD as showed in figure below.
You would see two folders, 'sample' and 'workflow'. The 'sample' folder contains required input files. The 'workflow' folder contains the workflow files and required resource files such as 'homologene.txt'.
Step3. Edit your input files
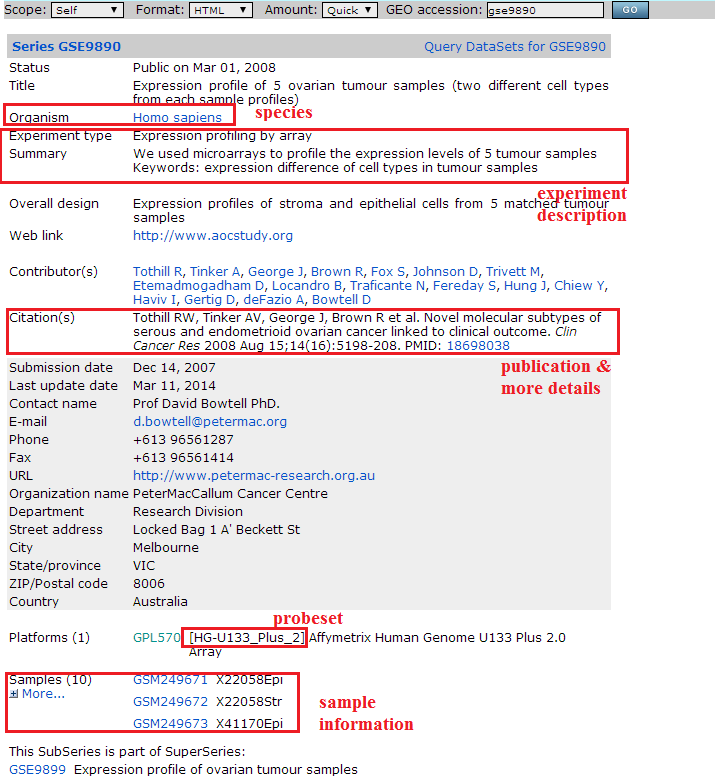
> Go to GEO database (http://www.ncbi.nlm.nih.gov/geo/) and search dataset that interests you
> Collect information as shown in below figure to fill datasets.csv and create corresponding dataset detail csv files (datainfo-xxx.csv).
Note: I. don't change the column names of datasets.csv, and datainfo files.
II. make sure 'Datainfo' in datasets.csv appointing to the correct datainfo csv file. Otherwise, MAAMD will encounter errors if it can't find the corresponding datainfo file.
III. attention, use '/' as the path separator in 'Datainfo' column.
Step 4. Open MAAMD
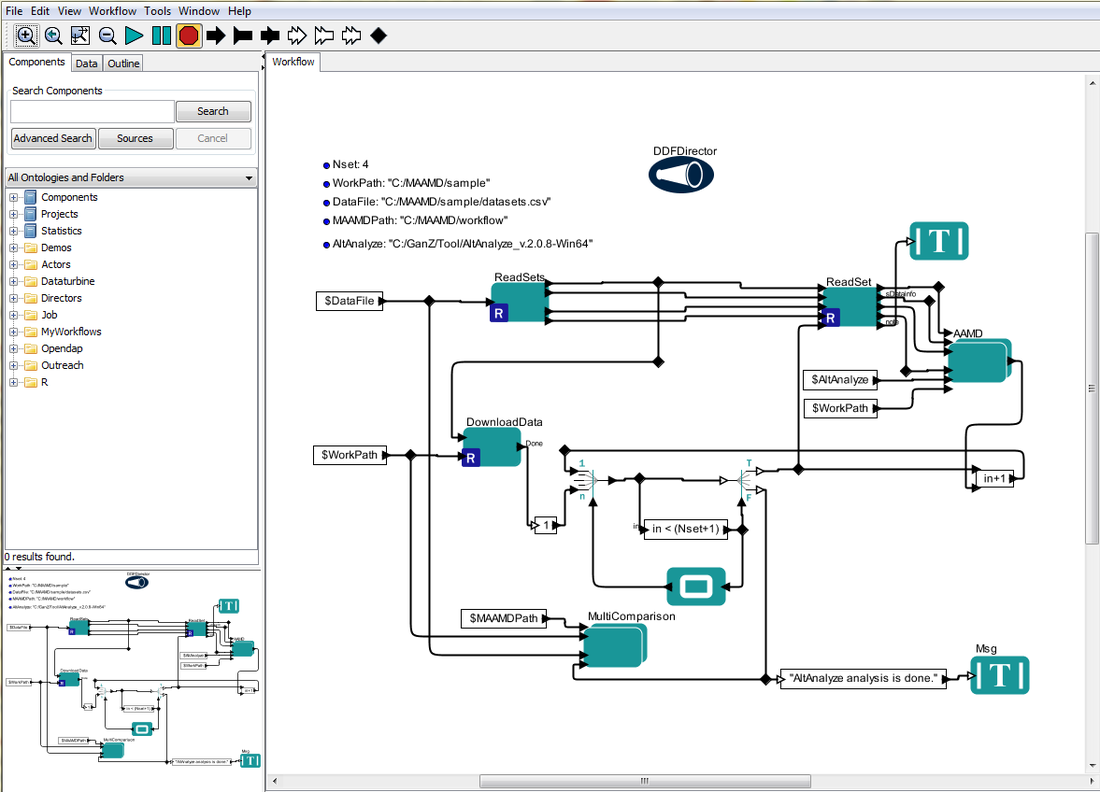
Start Kepler by double clicking Kepler icon, open MAAMD-ALL.xml from menu 'file' >> 'open...'
You will see the interface as below figure shows
Start Kepler by double clicking Kepler icon, open MAAMD-ALL.xml from menu 'file' >> 'open...'
You will see the interface as below figure shows
Step 5. Run MAAMD
> Edit 'WorkPath', 'DataFile', 'MAAMDPath' and 'AltAnalyze' by double-clicking the parameters in Kepler user interface, make sure that they point to
the right location.
> Check your datasets.csv, make sure each dataset has a correct link for the detail-description csv.
> Edit 'Nset' for the analysis of the first Nset datasets.
> Click 'Run' button (the green triangle button), the buttom status bar changes its status to 'executing...'
Step6. MAAMD Running Process
> 6A. First, you will see downloading bars which show the downloading process
> 6B. After downloading, a pop-up dialog shows which indicates the start of analysis
> 6C. Appear a webpage which allows you selecting samples for quality estimation.
Note: Only samples acquired by the same platform could be analyzed simultaneously. Some date sets contain samples acquired by different platforms, please avoid selecting samples acquired by different platforms, otherwise, it might cause errors or crash.
> 6D. Appear a webpage which contains the results of quality estimation.
> 6E. Appear a webpage which allows you selecting samples for meta-analyses. You can kick out those samples which have a quality issue.
> 6F. Appear a webpage which allows you selecting the comparison pairs.
> 6G. Start AltAnalyze analysis
> 6H. Once the analyses of first dataset is finished, it will start to analyze next dataset, and repeat steps from quality estimation to analysis.
> 6I. Appear a pop-up dialog which indicates that analyses for Nset have been done.
> 6J. Appear a webpage which allows you pick up datasets for an inter-dataset comparison.
Note: The list will contain all datasets listing in datasets.csv. If you didn't analyze all datasets, don't pick up those datasets which haven't been analyzed for the comparison. Otherwise, MAAMD will encounter errors since it can't find the required inputs.
> 6K. Appear a pop-up dialog which indicates the start of comparison.
> 6L. Appear a pop-up dialog which tells you the comparison result and where the conserved gene list is stored.
figure 6A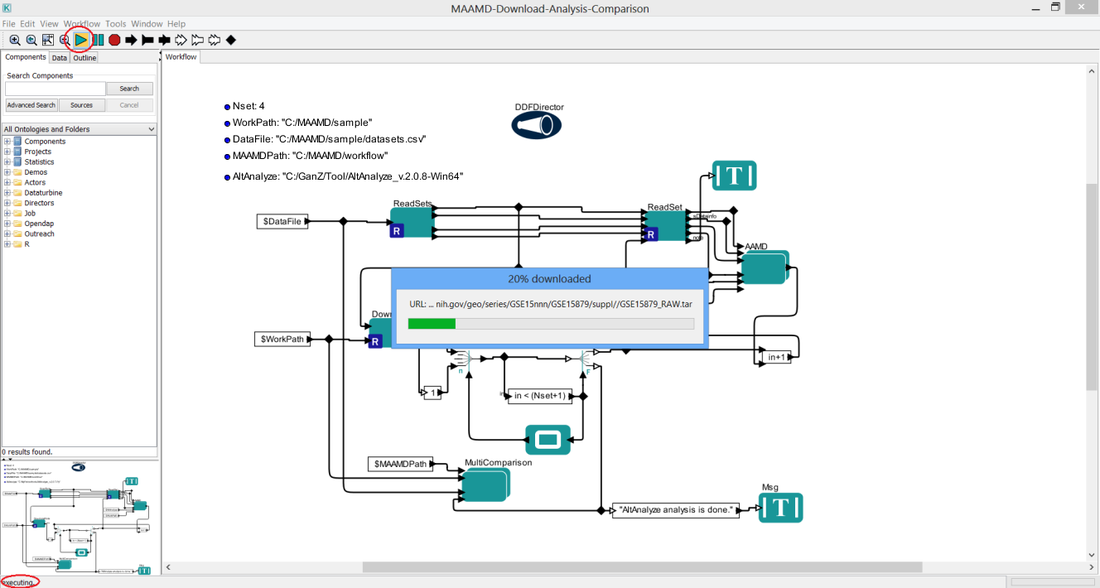
figure 6D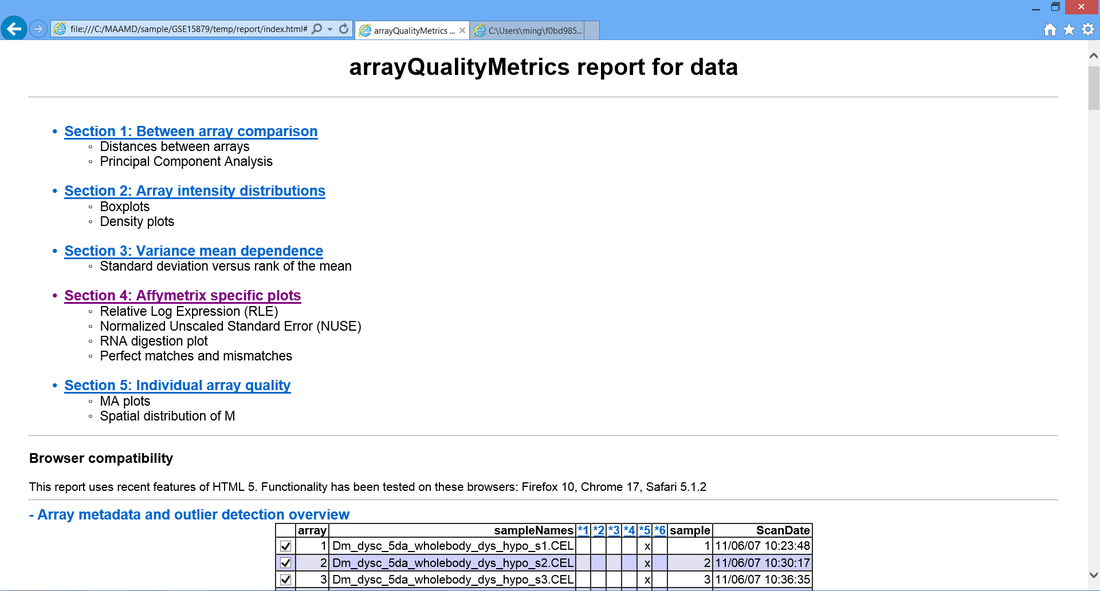
figure 6G
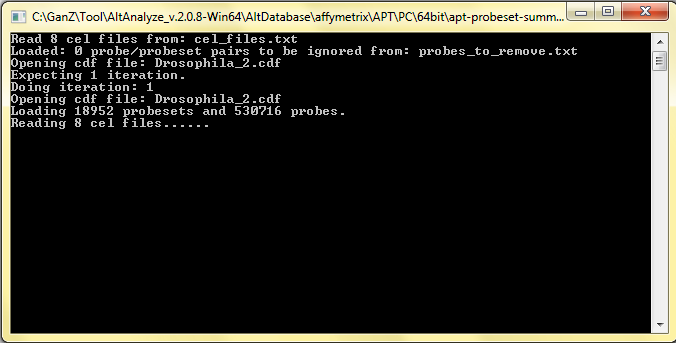
figure 6J
|
figure 6B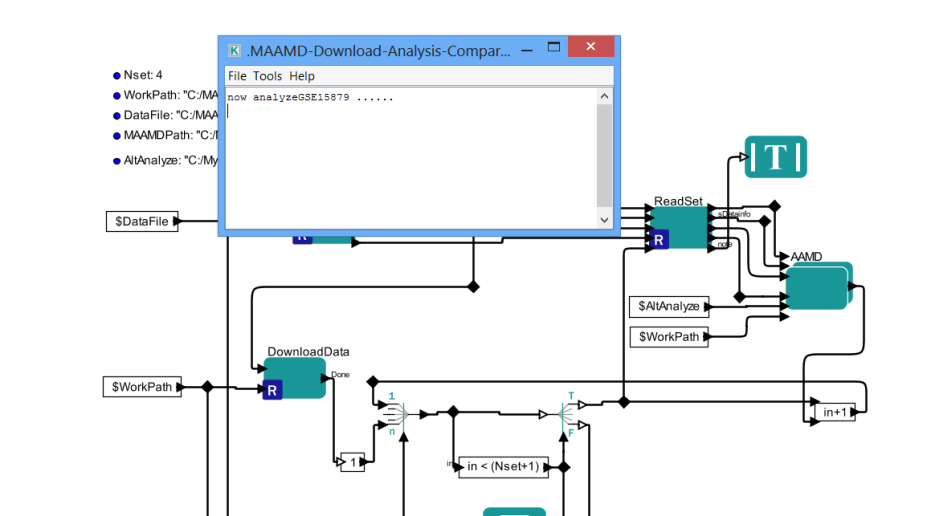
figure 6E
figure 6H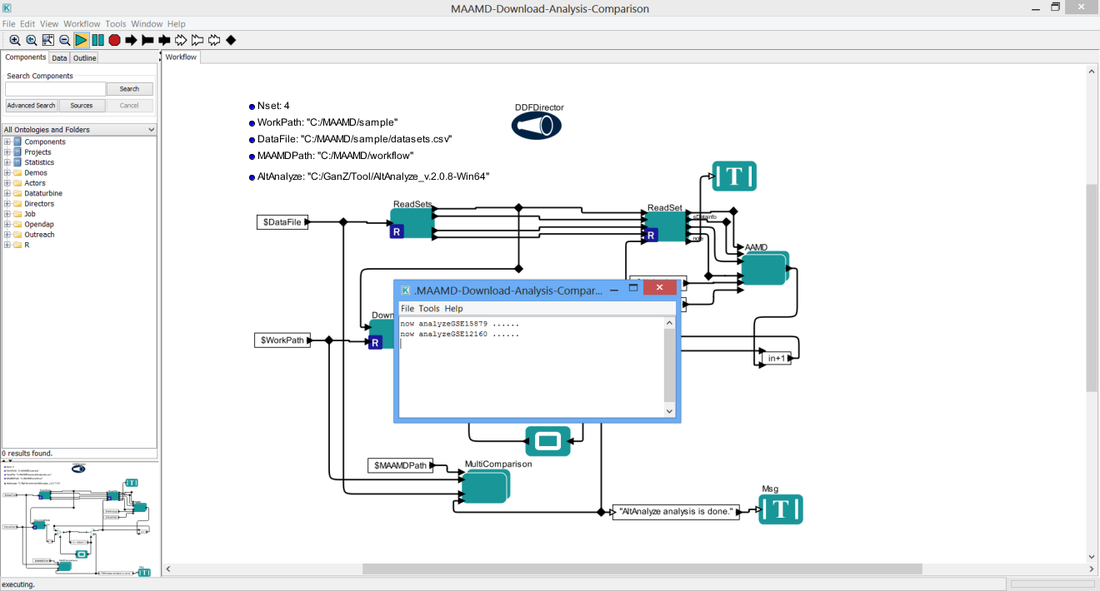
figure 6k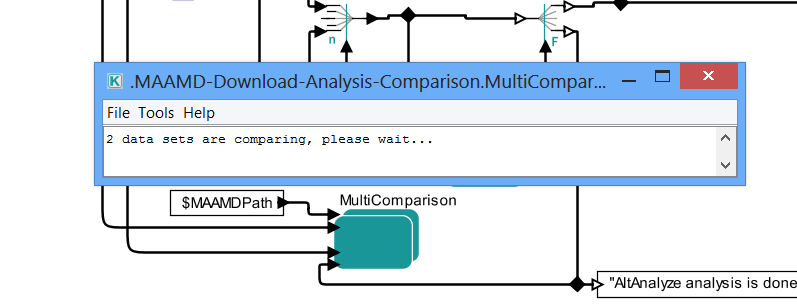
|
figure 6C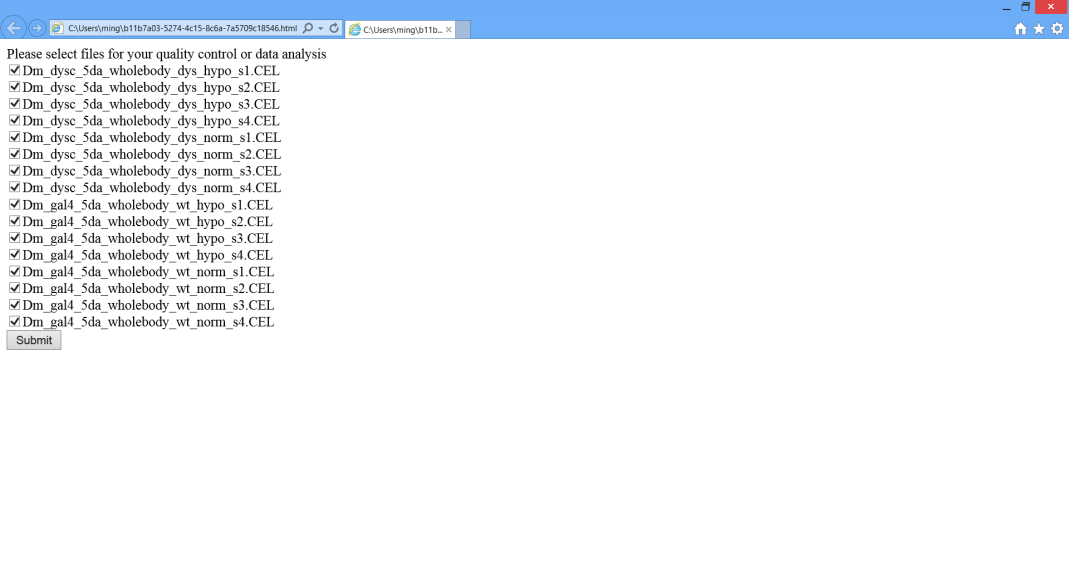
figure 6F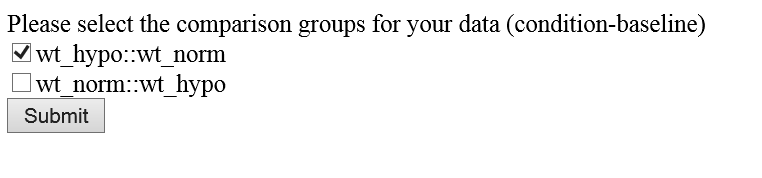
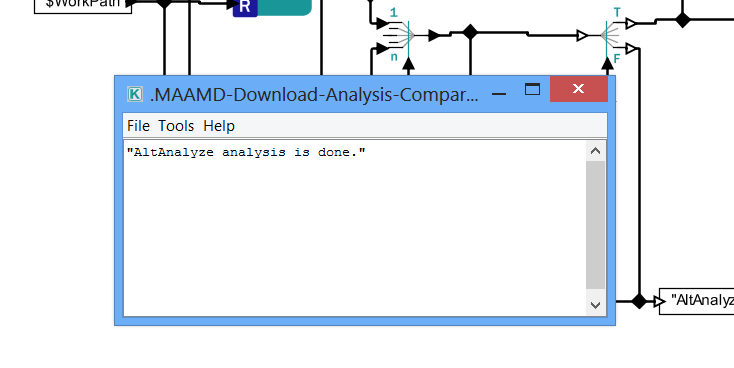
figure 6L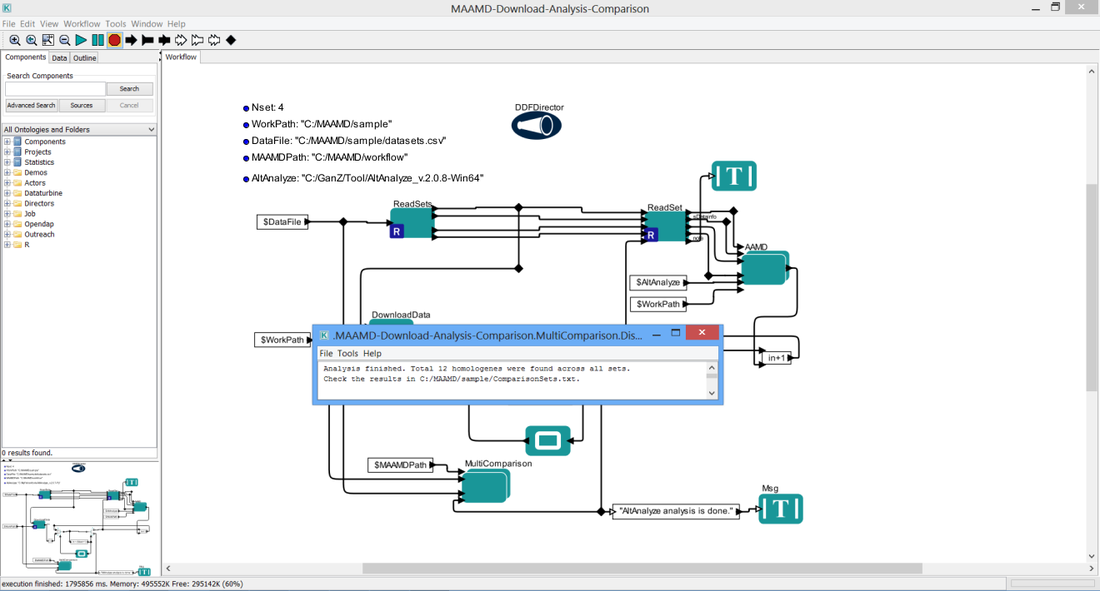
|
Step 7. Check Results
Go to the 'WorkPath' directory where your results are stored and check the results.
The figure below shows the results of this study case.
Go to the 'WorkPath' directory where your results are stored and check the results.
The figure below shows the results of this study case.
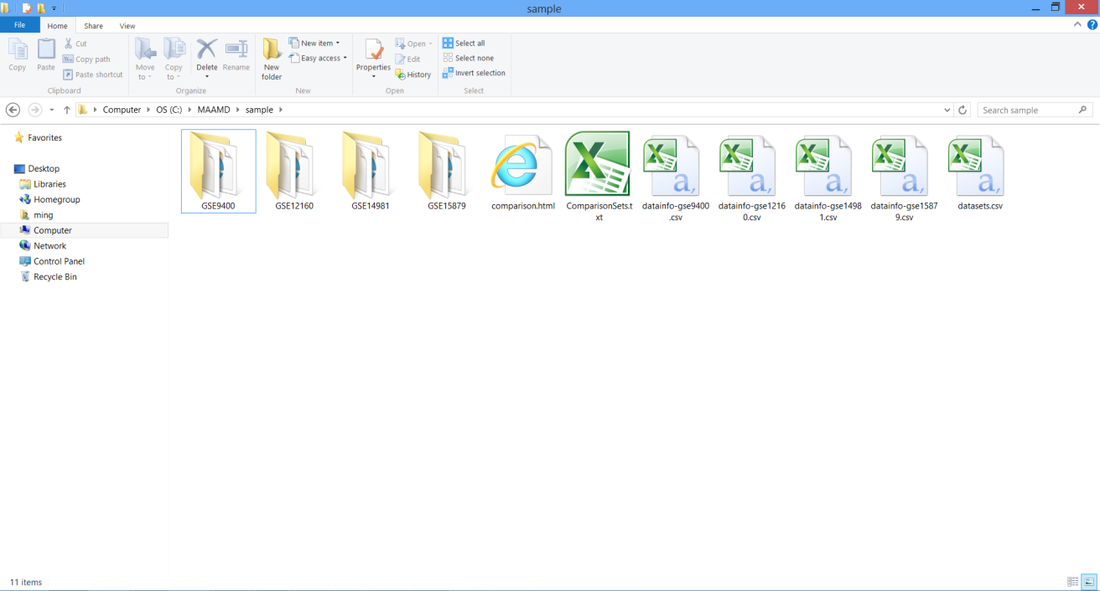
A typical output folder for one dataset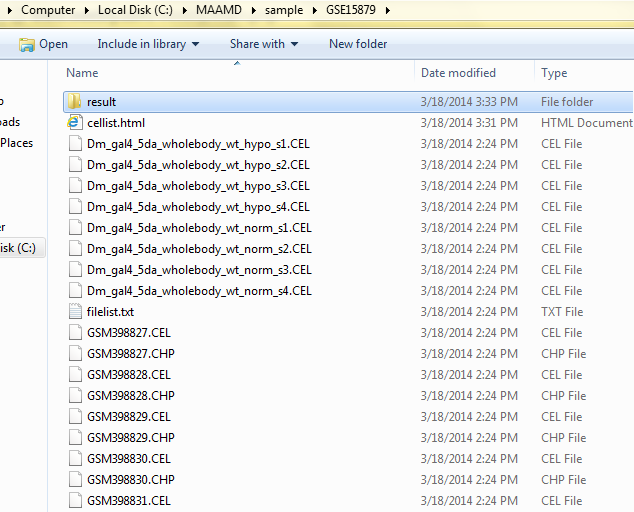
|
A typical result folder in the output folder for one dataset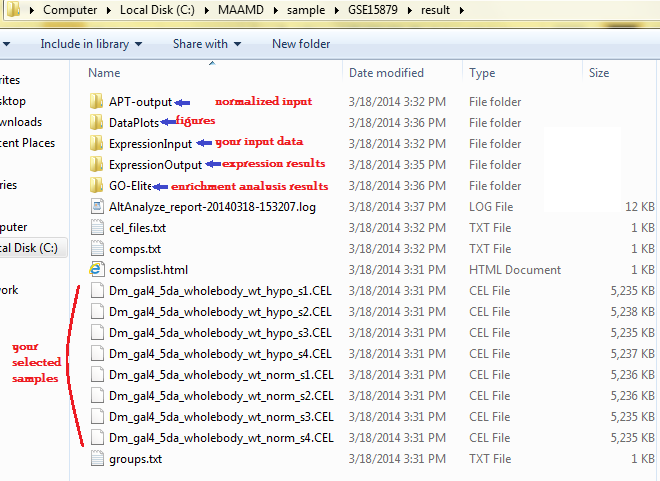
|
Here is a vedio which introduces Kepler & MAAMD briefly.

